Trimesh学习笔记
1 trimesh读写
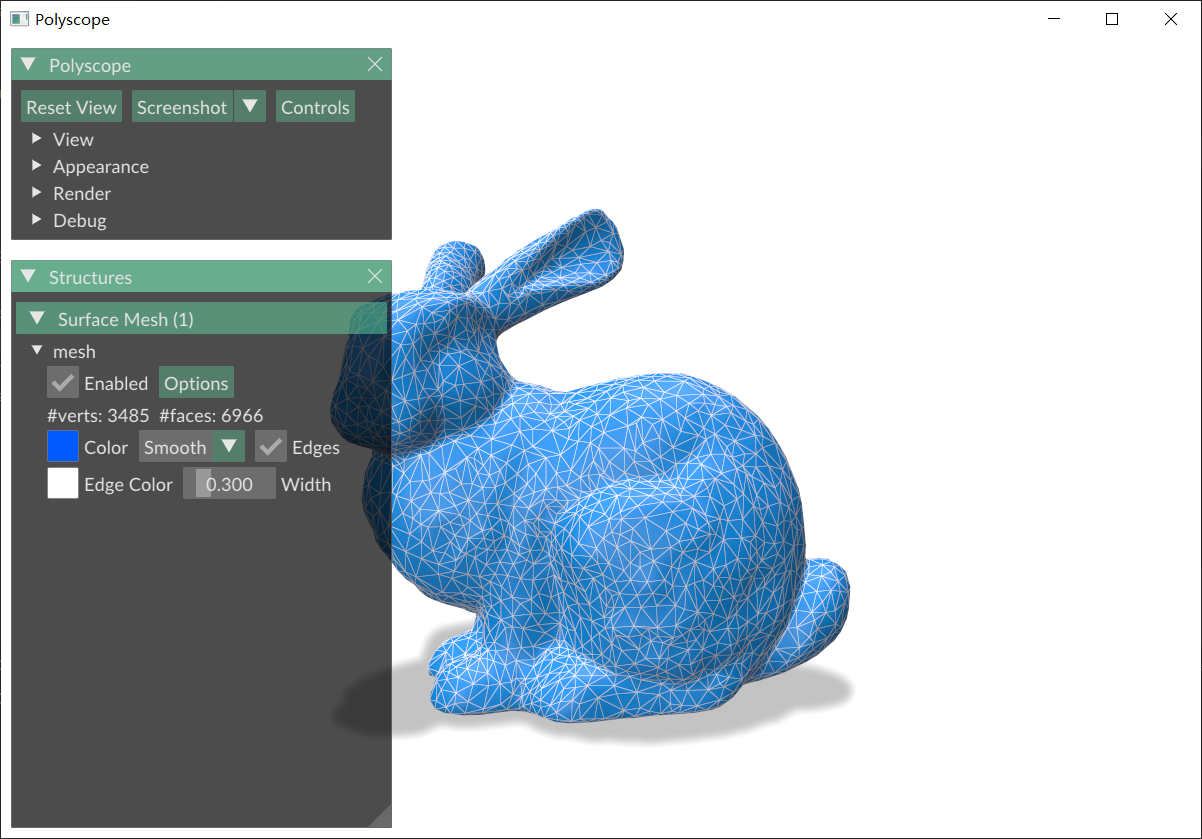
1.1 trimesh 读写mesh
import trimesh
import polyscope as ps
import numpy as np

# 读取mesh
mesh = trimesh.load_mesh("bunny.obj")
v = mesh.vertices
f = mesh.faces

# 可视化mesh
ps.init()
ps.register_surface_mesh("mesh", v, f,
                         color=[0, 91 / 255, 255 / 255],
                         edge_width=0.3,
                         edge_color=[1, 1, 1],
                         smooth_shade=True,
                         # material="flat"
                         )

ps.set_view_projection_mode("perspective")  # orthographic 正交投影   perspective 透视投影
# ps.set_navigation_style("planar")  # ['turntable','free','planar','none','first_person']
ps.set_ground_plane_mode("shadow_only")  # ['none','tile','tile_reflection','shadow_only']
# ps.set_ground_plane_height(-0.001)  # 这两行有用
ps.set_shadow_blur_iters(3)  # 模糊的程度,这个数值可以设置很大
ps.set_shadow_darkness(0.5)  # 这个数值也可以设置很大
ps.set_up_dir("y_up")  # 这个和设置视角会冲突,因此在添加视角参数时,这一行要注释掉
ps.set_front_dir('z_front')  # 这两行有用
ps.set_SSAA_factor(4)
ps.set_open_imgui_window_for_user_callback(False)  # 用于将原始imgui的界面关掉
ps.show()\

# 导出mesh
mesh.export("new_bunny.obj")
1.2 mesh信息
import trimesh

# 读取mesh
mesh = trimesh.load_mesh("bunny.obj")
v = mesh.vertices
f = mesh.faces

print(v.shape)
print(f.shape)

volume = mesh.volume
surface_area = mesh.area
is_watertight = mesh.is_watertight
is_convex = mesh.is_convex

print("体积:{:.5f}".format(volume))
print("表面积:{:.5f}".format(surface_area))
print("是否闭合:{}".format(is_watertight))
print("是否是凸的:{}".format(is_convex))
打印:
(3485, 3)
(6966, 3)
体积:0.00075
表面积:0.05821
是否闭合:True
是否是凸的:False
2 平移、缩放、旋转
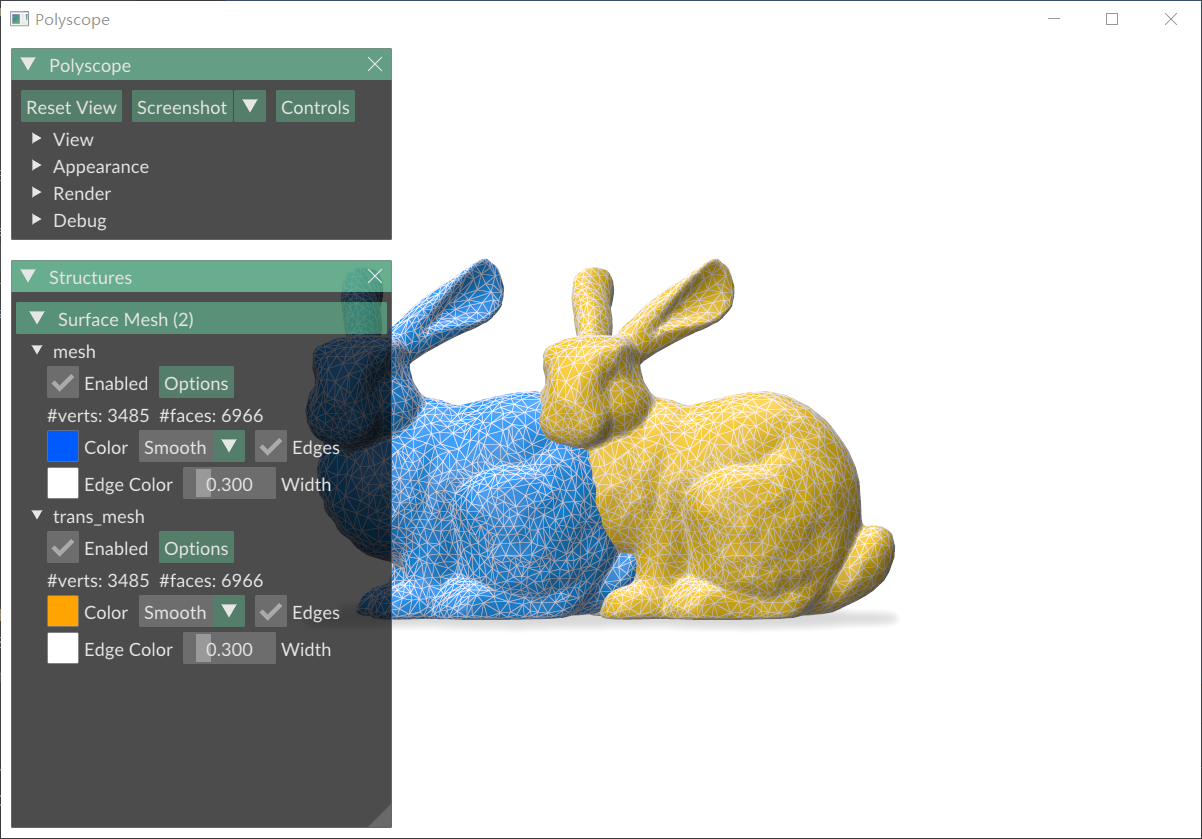
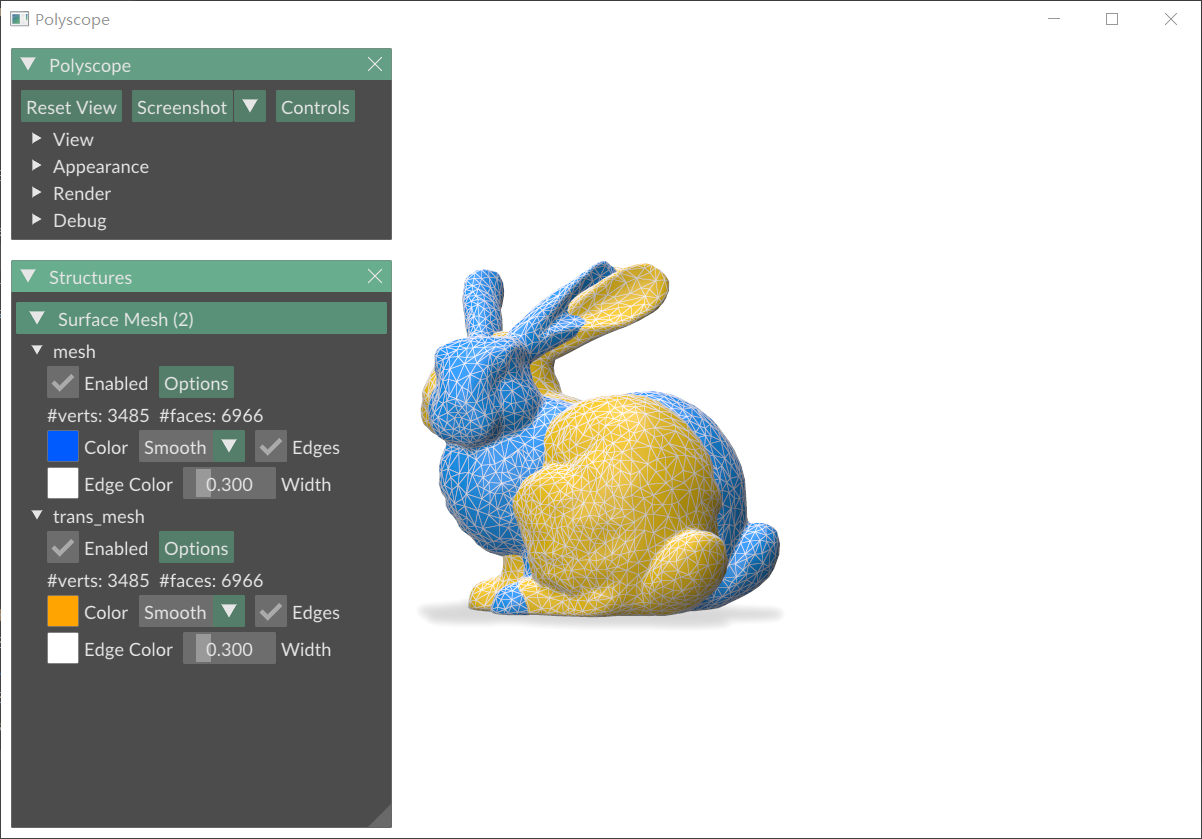
2.1 平移
import trimesh
import polyscope as ps
import numpy as np

# 读取mesh
mesh = trimesh.load_mesh("bunny.obj")
V, F = mesh.vertices, mesh.faces

# 平移
mesh.apply_translation([0.1, 0, 0])
new_v, new_f = mesh.vertices, mesh.faces

# 可视化mesh
ps.init()
ps.register_surface_mesh("mesh",
                         V, F,
                         color=[0, 91 / 255, 255 / 255],
                         edge_width=0.3,
                         edge_color=[1, 1, 1],
                         smooth_shade=True,
                         # transparency=0.2
                         # material="flat"
                         )

ps.register_surface_mesh("trans_mesh",
                         new_v, new_f,
                         color=[255 / 255, 164 / 255, 0],
                         edge_width=0.3,
                         edge_color=[1, 1, 1],
                         smooth_shade=True,
                         # transparency=0.2
                         # material="flat"
                         )

ps.set_view_projection_mode("orthographic")  # orthographic 正交投影   perspective 透视投影
# ps.set_navigation_style("planar")  # ['turntable','free','planar','none','first_person']
ps.set_ground_plane_mode("shadow_only")  # ['none','tile','tile_reflection','shadow_only']
# ps.set_ground_plane_height(-0.001)  # 这两行有用
ps.set_shadow_blur_iters(3)  # 模糊的程度,这个数值可以设置很大
ps.set_shadow_darkness(0.5)  # 这个数值也可以设置很大
ps.set_up_dir("y_up")  # 这个和设置视角会冲突,因此在添加视角参数时,这一行要注释掉
ps.set_front_dir('z_front')  # 这两行有用
ps.set_SSAA_factor(4)
ps.show()
2.2 缩放
import trimesh
import polyscope as ps
import numpy as np

# 读取mesh
mesh = trimesh.load_mesh("bunny.obj")
V, F = mesh.vertices, mesh.faces

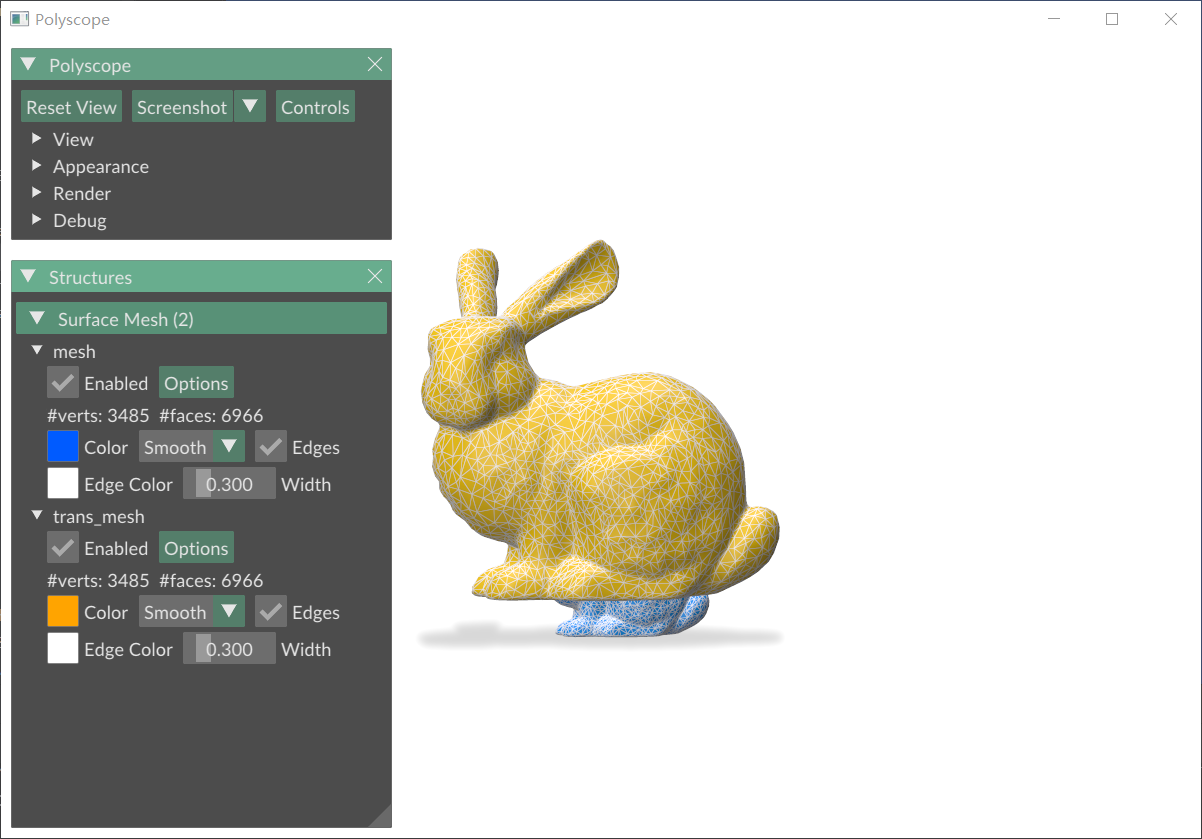
# 缩放
mesh.apply_scale(2)
new_v, new_f = mesh.vertices, mesh.faces

# 可视化mesh
ps.init()
ps.register_surface_mesh("mesh",
                         V, F,
                         color=[0, 91 / 255, 255 / 255],
                         edge_width=0.3,
                         edge_color=[1, 1, 1],
                         smooth_shade=True,
                         # transparency=0.2
                         # material="flat"
                         )

ps.register_surface_mesh("trans_mesh",
                         new_v, new_f,
                         color=[255 / 255, 164 / 255, 0],
                         edge_width=0.3,
                         edge_color=[1, 1, 1],
                         smooth_shade=True,
                         # transparency=0.2
                         # material="flat"
                         )

ps.set_view_projection_mode("orthographic")  # orthographic 正交投影   perspective 透视投影
# ps.set_navigation_style("planar")  # ['turntable','free','planar','none','first_person']
ps.set_ground_plane_mode("shadow_only")  # ['none','tile','tile_reflection','shadow_only']
# ps.set_ground_plane_height(-0.001)  # 这两行有用
ps.set_shadow_blur_iters(3)  # 模糊的程度,这个数值可以设置很大
ps.set_shadow_darkness(0.5)  # 这个数值也可以设置很大
ps.set_up_dir("y_up")  # 这个和设置视角会冲突,因此在添加视角参数时,这一行要注释掉
ps.set_front_dir('z_front')  # 这两行有用
ps.set_SSAA_factor(4)
ps.show()
2.3 旋转
import trimesh
import polyscope as ps
import numpy as np

# 读取mesh
mesh = trimesh.load_mesh("bunny.obj")
V, F = mesh.vertices, mesh.faces

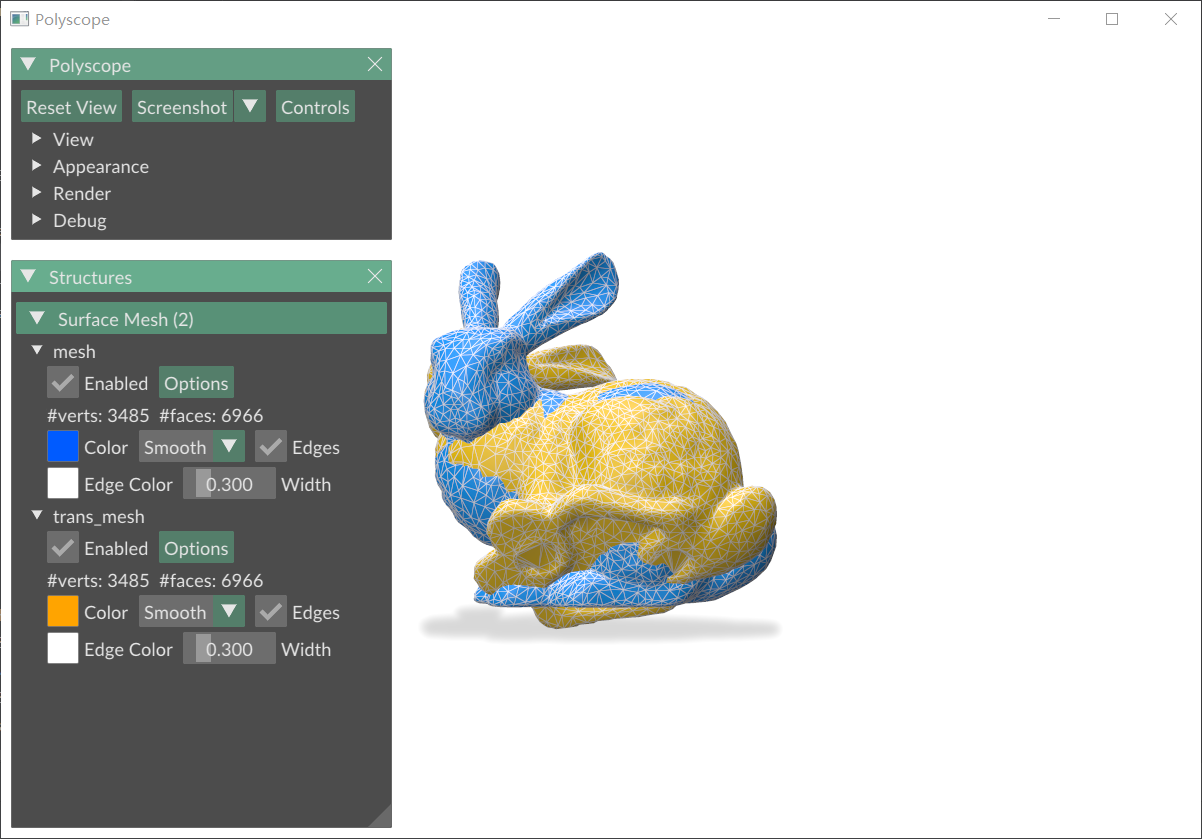
# 旋转
angle = 45 / 180 * np.pi

Tx = np.array([
    [1, 0, 0, 0],
    [0, np.cos(angle), np.sin(angle), 0],
    [0, -np.sin(angle), np.cos(angle), 0],
    [0, 0, 0, 1]])

Ty = np.array([
    [np.cos(angle), 0, -np.sin(angle), 0],
    [0, 1, 0, 0],
    [np.sin(angle), 0, np.cos(angle), 0],
    [0, 0, 0, 1]])

Tz = np.array([
    [np.cos(angle), np.sin(angle), 0, 0],
    [-np.sin(angle), np.cos(angle), 0, 0],
    [0, 0, 1, 0],
    [0, 0, 0, 1]])

# 沿mesh的中心进行旋转

# 1. 移到原点
center = mesh.centroid
mesh.apply_translation(-center)

# 2. 旋转
mesh.apply_transform(Tz)

# 3. (可选) 移回原位
mesh.apply_translation(center)

new_v, new_f = mesh.vertices, mesh.faces

# 可视化mesh
ps.init()
ps.register_surface_mesh("mesh",
                         V, F,
                         color=[0, 91 / 255, 255 / 255],
                         edge_width=0.3,
                         edge_color=[1, 1, 1],
                         smooth_shade=True,
                         # transparency=0.2
                         # material="flat"
                         )

ps.register_surface_mesh("trans_mesh",
                         new_v, new_f,
                         color=[255 / 255, 164 / 255, 0],
                         edge_width=0.3,
                         edge_color=[1, 1, 1],
                         smooth_shade=True,
                         # transparency=0.2
                         # material="flat"
                         )

ps.set_view_projection_mode("orthographic")  # orthographic 正交投影   perspective 透视投影
# ps.set_navigation_style("planar")  # ['turntable','free','planar','none','first_person']
ps.set_ground_plane_mode("shadow_only")  # ['none','tile','tile_reflection','shadow_only']
# ps.set_ground_plane_height(-0.001)  # 这两行有用
ps.set_shadow_blur_iters(3)  # 模糊的程度,这个数值可以设置很大
ps.set_shadow_darkness(0.5)  # 这个数值也可以设置很大
ps.set_up_dir("y_up")  # 这个和设置视角会冲突,因此在添加视角参数时,这一行要注释掉
ps.set_front_dir('z_front')  # 这两行有用
ps.set_SSAA_factor(4)
ps.show()
 |
 |
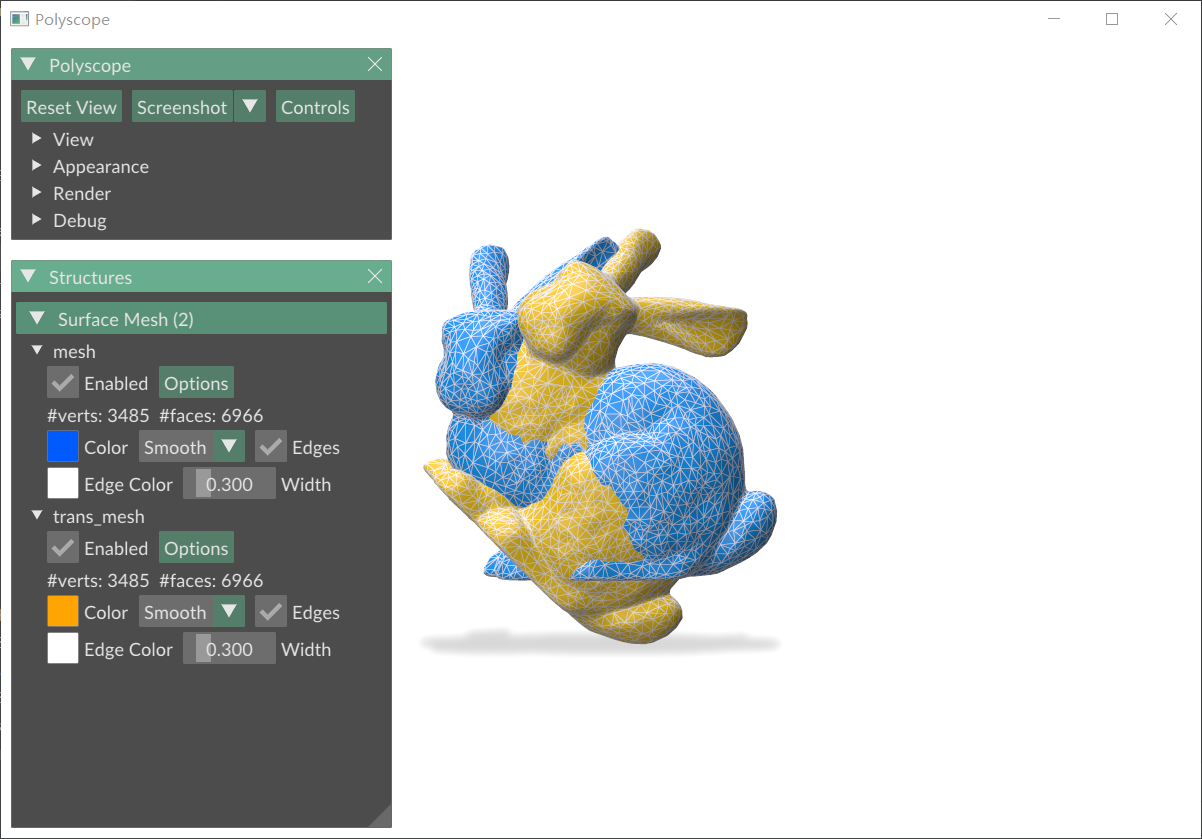 |
|---|---|---|
| 绕x轴旋转(屏幕左右方向轴) | 绕y轴旋转(屏幕上下方向轴) | 绕z轴旋转(指向屏幕方向轴) |
3 算法
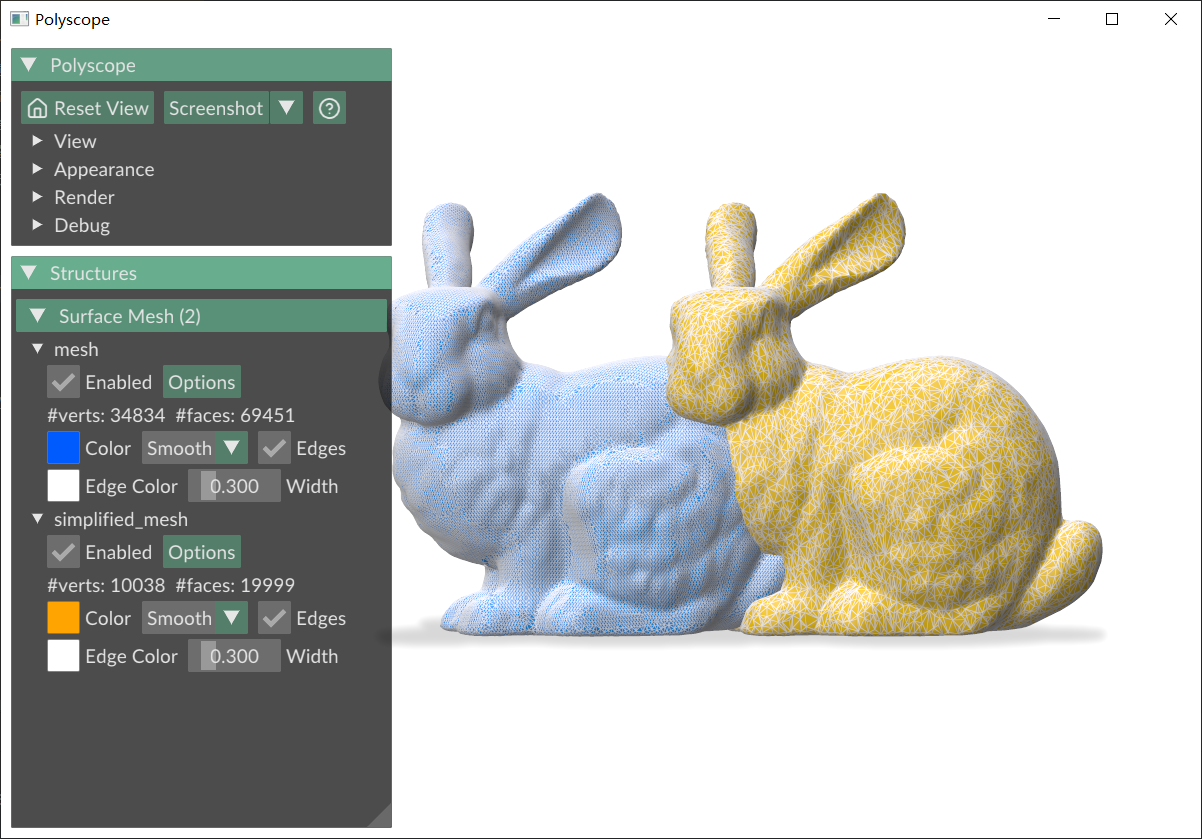
3.1 mesh简化
# trimesh在mesh简化时,依赖这个库
pip install fast-simplification

这个库需要Python 3.10+才能运行
import trimesh
import polyscope as ps

# 读取mesh
mesh = trimesh.load_mesh("stanford_bunny.ply")
v = mesh.vertices
f = mesh.faces

print(v.shape)
print(f.shape)

# 细分,平移方便可视化
simplified_mesh = mesh.simplify_quadric_decimation(face_count=20000)
simplified_mesh.apply_translation([0.1, 0, 0])

simplified_v = simplified_mesh.vertices
simplified_f = simplified_mesh.faces

# 可视化mesh
ps.init()
ps.register_surface_mesh("mesh",
                         v, f,
                         color=[0, 91 / 255, 255 / 255],
                         edge_width=0.3,
                         edge_color=[1, 1, 1],
                         smooth_shade=True,
                         # transparency=0.2
                         # material="flat"
                         )

ps.register_surface_mesh("simplified_mesh",
                         simplified_v, simplified_f,
                         color=[255 / 255, 164 / 255, 0],
                         edge_width=0.3,
                         edge_color=[1, 1, 1],
                         smooth_shade=True,
                         # transparency=0.2
                         # material="flat"
                         )

ps.set_view_projection_mode("orthographic")  # orthographic 正交投影   perspective 透视投影
# ps.set_navigation_style("planar")  # ['turntable','free','planar','none','first_person']
ps.set_ground_plane_mode("shadow_only")  # ['none','tile','tile_reflection','shadow_only']
# ps.set_ground_plane_height(-0.001)  # 这两行有用
ps.set_shadow_blur_iters(3)  # 模糊的程度,这个数值可以设置很大
ps.set_shadow_darkness(0.5)  # 这个数值也可以设置很大
ps.set_up_dir("y_up")  # 这个和设置视角会冲突,因此在添加视角参数时,这一行要注释掉
ps.set_front_dir('z_front')  # 这两行有用
ps.set_SSAA_factor(4)
ps.show()
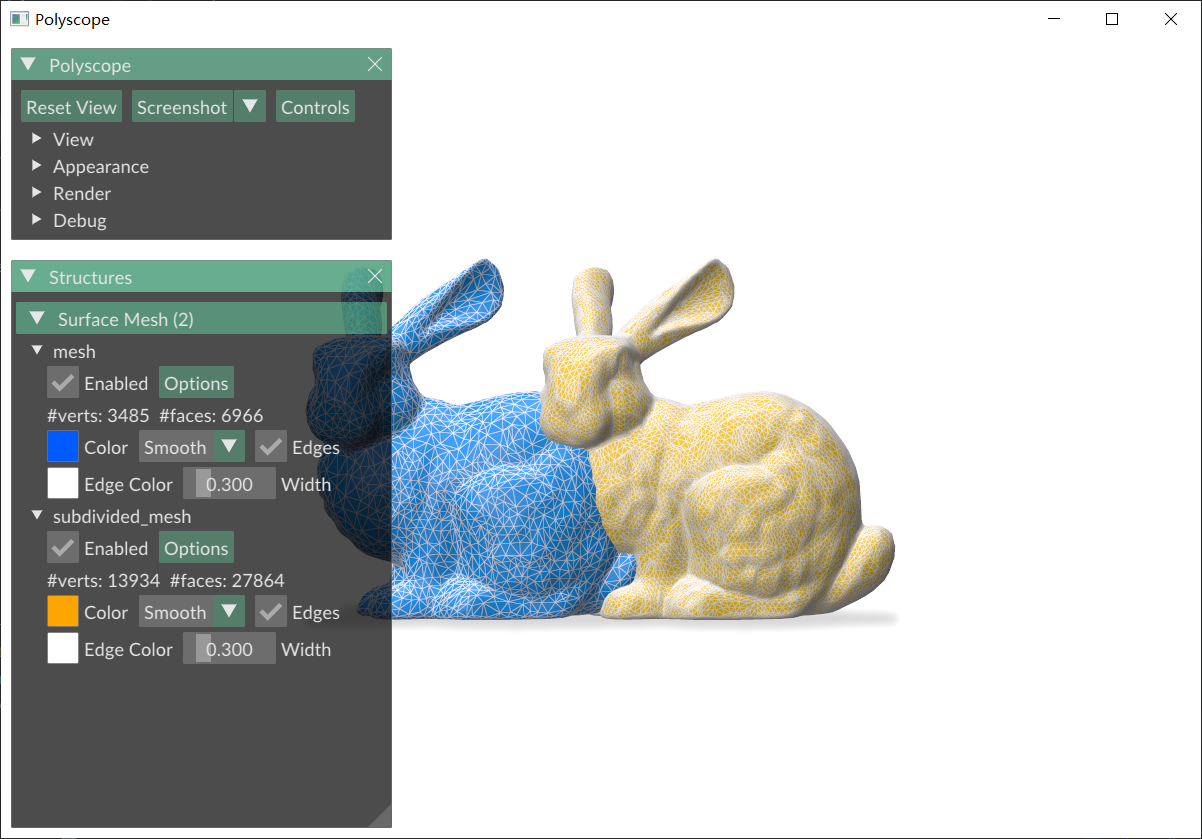
3.2 mesh细分
import trimesh
import polyscope as ps

# 读取mesh
mesh = trimesh.load_mesh("bunny.obj")
v = mesh.vertices
f = mesh.faces

# 细分,平移方便可视化
subdivided_mesh = mesh.subdivide()
subdivided_mesh.apply_translation([0.1, 0, 0])

subdivided_v = subdivided_mesh.vertices
subdivided_f = subdivided_mesh.faces

# 可视化mesh
ps.init()
ps.register_surface_mesh("mesh",
                         v, f,
                         color=[0, 91 / 255, 255 / 255],
                         edge_width=0.3,
                         edge_color=[1, 1, 1],
                         smooth_shade=True,
                         # transparency=0.2
                         # material="flat"
                         )

ps.register_surface_mesh("subdivided_mesh",
                         subdivided_v, subdivided_f,
                         color=[255 / 255, 164 / 255, 0],
                         edge_width=0.3,
                         edge_color=[1, 1, 1],
                         smooth_shade=True,
                         # transparency=0.2
                         # material="flat"
                         )

ps.set_view_projection_mode("orthographic")  # orthographic 正交投影   perspective 透视投影
# ps.set_navigation_style("planar")  # ['turntable','free','planar','none','first_person']
ps.set_ground_plane_mode("shadow_only")  # ['none','tile','tile_reflection','shadow_only']
# ps.set_ground_plane_height(-0.001)  # 这两行有用
ps.set_shadow_blur_iters(3)  # 模糊的程度,这个数值可以设置很大
ps.set_shadow_darkness(0.5)  # 这个数值也可以设置很大
ps.set_up_dir("y_up")  # 这个和设置视角会冲突,因此在添加视角参数时,这一行要注释掉
ps.set_front_dir('z_front')  # 这两行有用
ps.set_SSAA_factor(4)
ps.show()
4 有用的操作
4.1 选取mesh顶点与mesh合并
import trimesh
import numpy as np
import polyscope as ps


def place_spheres_on_vertices(mesh, vertex_indices, sphere_radius=0.01):
    #  https://github.com/boqian-li/ETCH/blob/dc743bcd01e8616987de09ed8f222eff64f0f55c/scripts/try_geodesic_distance.py#L4
    spheres = []
    for index in vertex_indices:
        # Get the vertex position
        vertex_position = mesh.vertices[index]

        # Create a sphere
        sphere = trimesh.creation.icosphere(subdivisions=2, radius=sphere_radius)

        # Move the sphere to the vertex position
        sphere.apply_translation(vertex_position)

        # Set the sphere color to red
        sphere.visual.vertex_colors = [255, 0, 0, 255]  # RGBA for red

        # Add the sphere to the list
        spheres.append(sphere)

    # Combine all spheres into a single mesh
    combined_spheres = trimesh.util.concatenate(spheres)

    # Combine the original mesh with the spheres
    final_mesh = trimesh.util.concatenate([mesh, combined_spheres])

    return final_mesh


mesh = trimesh.load_mesh("bunny.obj")
V, F = mesh.vertices, mesh.faces

select_p_id = [1, 10, 20, 30, 40, 50, 60, 70, 80, 90, 100]

ps.init()
ps_mesh = ps.register_surface_mesh("mesh", V, F,
                                   color=[0, 91 / 255, 255 / 255],
                                   edge_width=0.3,
                                   edge_color=[1, 1, 1],
                                   smooth_shade=True,
                                   # transparency=0.2
                                   # material="flat"
                                   )

ps.register_point_cloud("select_p", V[select_p_id],
                        color=[255 / 255, 0, 27 / 255],
                        radius=0.006)

ps.set_view_projection_mode("perspective")  # orthographic 正交投影   perspective 透视投影
# ps.set_navigation_style("planar")  # ['turntable','free','planar','none','first_person']
ps.set_ground_plane_mode("shadow_only")  # ['none','tile','tile_reflection','shadow_only']
# ps.set_ground_plane_height(-0.001)  # 设置地平面高度
ps.set_shadow_blur_iters(3)  # 设置地平面阴影模糊程度
ps.set_shadow_darkness(0.5)  # 设置地平面阴影明暗程度
ps.set_up_dir("y_up")  # 设置y轴正方向向上(这个和设置视角会冲突,因此在添加视角参数时,这一行要注释掉)
ps.set_front_dir('z_front')  # 设置z轴正方向向前
ps.set_SSAA_factor(4)  # 在截图时,设置为4时,截图会更清晰
ps.show()

new_mesh = place_spheres_on_vertices(mesh, select_p_id, sphere_radius=0.001)
new_mesh.export("bunny_with_spheres.obj")
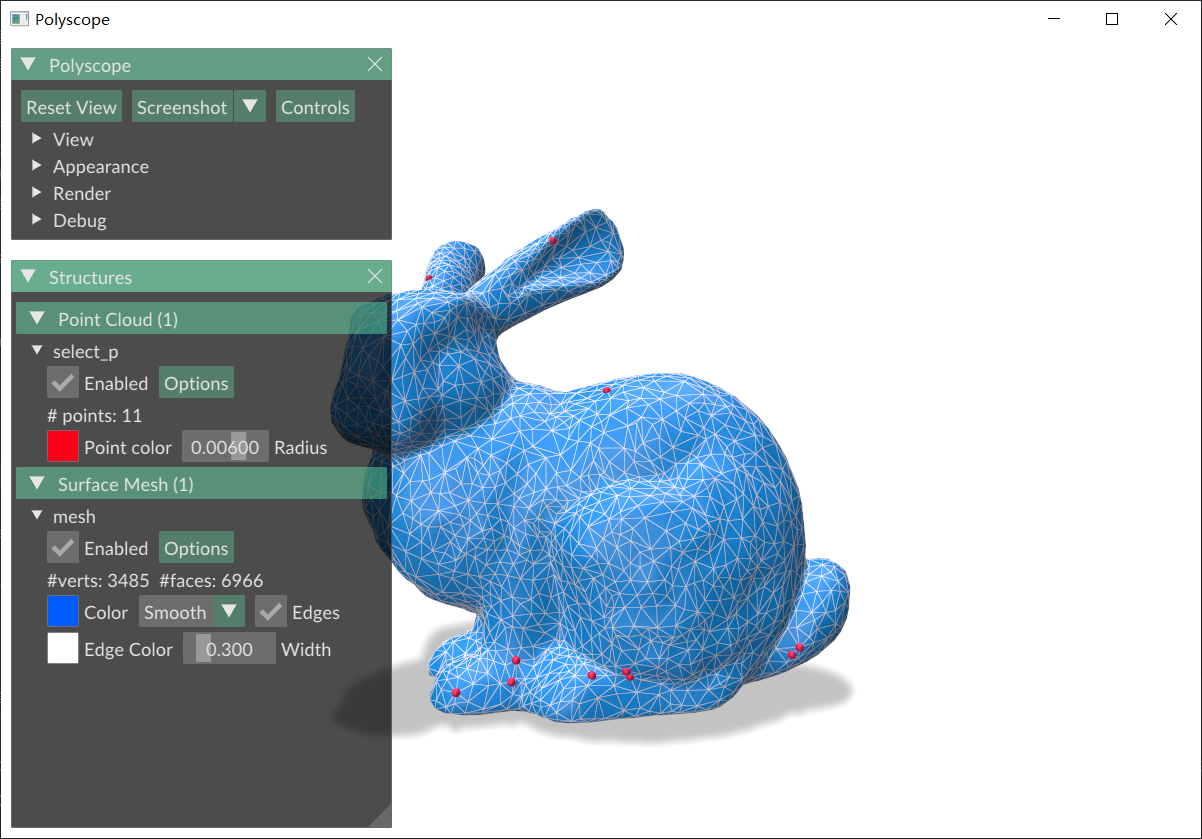 |
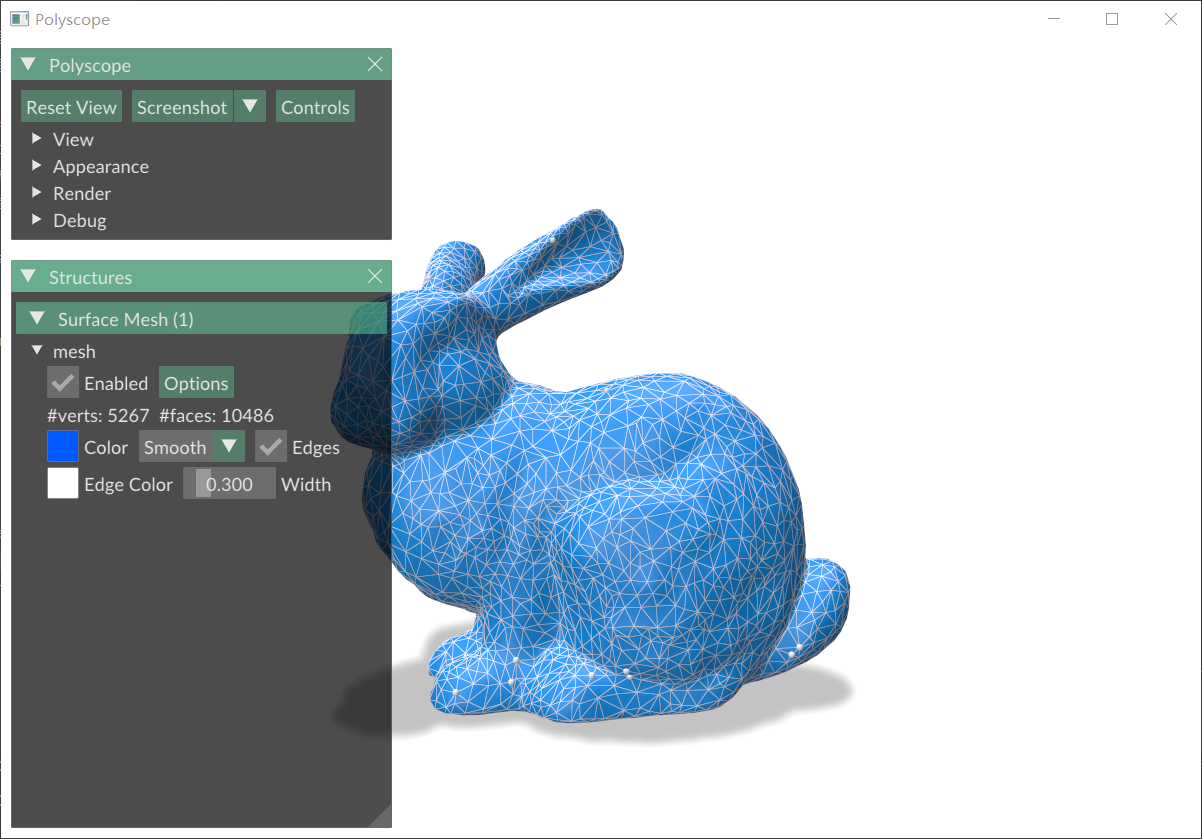 |
|---|---|
| polyscope可视化选取的点 | 选取的点使用球体代替,与mesh合并 |